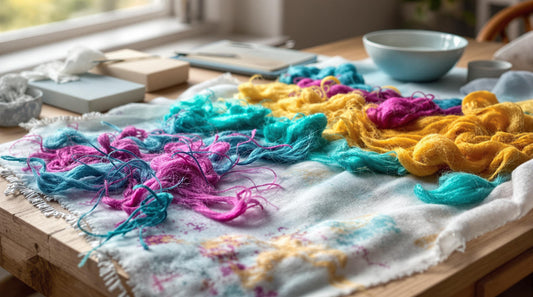

Nuno felting combines wool fibers with lightweight fabrics like silk or gauze to create beautiful, textured textiles. It’s beginner-friendly, eco-conscious, and perfect for wearable art or decorative projects. Here’s what you’ll learn:
- Basic Nuno Felting: Start with simple scarves or panels using wool and fabric.
- Adding Texture: Create folds, ridges, and patterns for a dynamic look.
- Layering Techniques: Use multiple layers of wool and fabric for depth.
- Making Clothing: Craft garments while accounting for wool shrinkage.
- Advanced Methods: Incorporate embellishments, dyes, and specialty fibers.
Quick Overview of Materials:
- Fabrics: Silk chiffon, gauze, muslin.
- Wool: Fine merino wool roving.
- Tools: Bubble wrap, spray bottle, rolling pin, scissors.
Nuno felting is versatile, offering endless creative possibilities. Let’s explore these techniques step by step!
Beginners Simple Nuno Felt Scarf Tutorial
Materials and Tools Needed
Getting started with nuno felting requires some basic materials and tools to ensure a smooth process.
Materials You'll Need
Merino wool is a great choice for beginners because its fine, soft fibers are easy to work with. Combine it with lightweight, loose-weave fabrics like silk chiffon, silk gauze, cotton gauze, or lightweight muslin for the best results [1][4].
Felting Solutions
A mild soap solution, such as liquid olive oil soap, works well to help the fibers bond during the felting process [2][4].
Tools to Have on Hand
Here’s a quick list of tools you’ll need:
- Bubble wrap or plastic sheeting: Helps create friction during felting.
- Rolling pin or pool noodle: Used for agitation.
- Nylon tulle: Keeps fibers in place while working.
- Rubber gloves: Protects your hands.
- Spray bottle: For evenly distributing water.
- Sharp scissors: Essential for cutting materials.
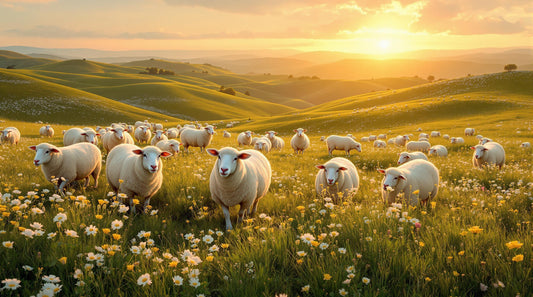
If you're looking for quality merino wool, New England Woolens offers durable, eco-conscious options that work well for nuno felting projects [3].
Once you’ve gathered these materials and tools, you’re ready to dive into beginner techniques and start crafting your nuno felting creations.
1. Basic Nuno Felting Method
This method is a great starting point for anyone looking to try nuno felting. It’s ideal for simple projects like scarves or decorative panels.
Setting Up Your Workspace
Start by placing bubble wrap (bubbles facing up) on a flat surface. Lay your lightweight fabric smoothly on top.
Preparing and Laying the Wool
Take thin, airy layers of wool roving and arrange them in a crosshatch pattern over your fabric. Make sure the coverage is even, avoiding any thick or bare spots.
The Felting Process
-
Wetting the Materials
Spray warm, soapy water evenly across the fibers. Gently press down to soak the fibers. Cover the setup with nylon tulle, and use small, circular motions to help the wool bond with the fabric. Continue this for 5-10 minutes. -
Rolling Phase
Roll the piece tightly in the bubble wrap. Apply firm, consistent pressure for about 15 minutes, unrolling occasionally to check the progress.
Testing the Bond
To check if the fibers have fused, do a pinch test. Lift a small section of felt gently. If the layers separate, keep working on it. If they hold together, you’re ready to move on.
Final Steps
Rinse the piece thoroughly in cold water to get rid of any soap. Press out excess water gently, but don’t wring it out. Dry it flat or hang it in the shade to keep its texture and shape intact [3].
Once you’re comfortable with this basic technique, you can try adding details like textures or layered fabrics to create more complex designs.
2. Adding Texture to Nuno Felt
Once you've got the basics of nuno felting down, you can step it up by adding texture. This approach turns flat fabric into eye-catching, three-dimensional designs by carefully manipulating the material during the felting process.
Scrunching Technique
During the rolling stage, gather and bunch sections of the fabric while it's wrapped in bubble wrap. This creates natural ridges and valleys, giving your piece a more organic, textured look.
Folding for Patterns
Folding the fabric before or during the felting process can create unique patterns. Try pleats for a structured look or random folds for a more freeform design. Keep in mind that these folds will set permanently, so plan your layout carefully.
Layering for Visual Impact
Strategic layering of wool roving can add depth and bring out the texture in your work. Here are a few layering ideas:
| Technique | Effect |
|---|---|
| Thin Single Layer | Adds subtle texture, great for scarves. |
| Multiple Crossed Layers | Creates raised patterns for panels. |
| Uneven Distribution | Produces dynamic surfaces for shawls. |
Tools to Enhance Texture
Using specialized tools can also help you create more intricate textures. Some options include:
- Bubble wrap in various sizes
- Textured rolling pins
- Ridged felting mats
Tips for Controlling Texture
- Apply even pressure across your piece to ensure consistency.
- Place folds with care to achieve your desired design.
- Use warm water and just a small amount of soap for faster, more even felting [2].
Once you’ve got the hang of these techniques, you can push the boundaries by layering multiple fabrics to craft even more detailed and textured designs.
sbb-itb-b77f5dc
3. Using Multiple Layers in Nuno Felting
Layering in nuno felting takes your designs to the next level, adding depth and complexity to your creations. The trick lies in understanding how each layer interacts to produce striking effects.
Choosing and Preparing Materials
Start with a lightweight base fabric like silk chiffon or gauze, pair it with fine merino wool for structure, and add specialty fibers for accents [1]. These materials combine to create pieces that balance structure with fluidity.
How to Build Layers
Spread thin, even layers of wool roving to avoid any bulk or gaps. This ensures smooth adhesion and a polished finish [1][4]. Pay close attention to keeping the wool evenly distributed across your workspace.
Managing Temperature
Begin with cold water to position fibers accurately, then gradually introduce warm water to help the felting process [2]. This method gives you better control over how the fibers bond.
Adding Dimension
Try leaving parts of the fabric exposed, layering fibers in different directions, or varying the thickness of the wool. These techniques can bring depth and texture to your work, making it visually engaging.
Common Issues and Fixes
If you notice gaps during felting, fill them in with small amounts of wool roving. Keep your layers light to ensure the final piece stays flexible and drapes well [3].
If you're just starting out, try a simple two-layer project, like a lightweight scarf, before tackling more intricate designs [4]. Once you're comfortable, you can use these layering techniques to create stunning wearable art like scarves or shawls.
4. Nuno Felting for Clothing
After getting the hang of layering techniques, you can take your skills up a notch by crafting wearable garments with nuno felting.
Choosing the Right Materials
The materials you pick make all the difference. Lightweight, open-weave fabrics like silk chiffon and fine merino wool are ideal for creating garments that are both stylish and comfortable [1].
Accounting for Shrinkage
Wool shrinks - it's just part of the process. Plan for a 30-40% reduction by measuring your wool portions carefully. Testing on small samples first can save you from surprises later [2].
Shaping Your Garment
Proper shaping ensures your garment fits well. Tools like bubble wrap and pool noodles (from earlier steps) come in handy here:
- Bubble wrap: Helps distribute pressure evenly.
- Pool noodle: Perfect for shaping cylindrical sections like sleeves.
- Stretchy ties: Great for creating snug, fitted areas.
Tips for Different Garments
The way you lay out your wool depends on the garment you're making. For a flowing top, use a looser layout to keep it drapey. Skirts, on the other hand, need firmer felting for structure. If you’re new to this, start simple with sleeveless tops or straight skirts to build your confidence [3].
Adding Style with Decorative Fibers
Want to make your garment stand out? Add decorative fibers for texture and visual interest. Just be mindful of where you place them - keep them light in areas that move a lot to avoid stiffness and discomfort [4].
Once you’ve finished your first piece, you’ll be ready to dive into more complex nuno felting projects.
5. Advanced Nuno Felting Techniques
Once you've mastered the basics, these advanced techniques can help you take your Nuno felting projects to the next level.
Adding Embellishments
Want to make your designs stand out? Try placing beads or threads on the fibers before felting. These details can create striking textures and visual interest, especially for wearable pieces.
Dyeing During the Process
Experiment with wool-specific dyes while felting. Apply them at different stages to create unique color effects. Use cold water and soap to control the felting speed and ensure the colors blend just right.
Using Tools for Texture
Mix fibers like merino wool for smoothness, silk for a glossy finish, alpaca for softness, and camel hair for added depth. Tools like solar pool covers can help with even agitation, ridged rolling pins can create patterns, and nylon tulle can protect delicate designs while you work.
Pro Tips for Better Results
Start small to test ideas and fiber combinations. Be careful not to overwork your designs during the fulling stage. When using multiple fibers or embellishments, thorough rinsing and proper drying are essential, as different materials react differently during the process.
These methods can help you create detailed, high-quality designs that elevate your Nuno felting projects to a professional level [1][2].
Conclusion
Nuno felting blends the qualities of wool and silk to create lightweight, textured textiles that open up plenty of creative possibilities. Begin with small test pieces to see how fibers interact, then move on to more detailed projects like layered fabrics or decorative accents.
You can grow your skills by connecting with fiber arts communities or checking out online resources like FiberArtsy and NunoFelting.com for tutorials and ideas. If you're focused on eco-friendly crafting, brands such as New England Woolens provide fibers that align with sustainable practices often associated with nuno felting.
It takes time and practice to get the hang of nuno felting. Be mindful of how different materials shrink, and always test new methods on smaller pieces before committing to larger projects. As you become more confident, try complex designs by layering fabrics, experimenting with various bases, or adding embellishments like beads and threads.
Whether you're making a delicate scarf or a bold wall hanging, nuno felting provides a strong foundation for creative expression. With patience and practice, you'll develop your own style and explore the full potential of this versatile craft.
FAQs
Below are answers to common questions that beginners often have about nuno felting. These insights will help you get started with your projects.
What is the process of nuno felting?
Nuno felting combines wool fibers with loosely woven fabric to create unique textiles. The process involves using soapy water and friction to bind the fibers to the fabric. Cold water is often used to control the movement of fibers, ensuring they integrate well with the fabric. The result is a textile that blends the characteristics of both the wool and the base fabric.
What is the difference between nuno and wet felting?
The key difference lies in the materials and results. Nuno felting incorporates wool fibers into a fabric base, producing lightweight and flexible textiles. Wet felting, on the other hand, uses only layers of wool to create dense, standalone felt. This makes nuno felting perfect for projects that require flexibility while still showcasing the texture of felt.
What fabric is best for nuno felting?
Here are some fabrics that work well for nuno felting:
| Fabric Type | Characteristics |
|---|---|
| Pure Silk | Lightweight and strong |
| Cotton Gauze | Loosely woven and breathable |
| Scrim | Open weave and sturdy |
These fabrics are ideal for creating items like scarves, shawls, and lightweight garments. For more details on fabric and wool choices, check out the 'Materials and Tools Needed' section.
If you're just starting out, silk gauze or lightweight cotton is a great choice. These materials easily bond with wool fibers and hold up well during the felting process, making them beginner-friendly options.